Welcome to the documentation for the CareHQ WordPress Form Connector!
This tool is designed to seamlessly connect your existing WordPress forms (like Gravity Forms, WPForms, Contact Form 7, etc.) directly to your CareHQ CRM instance. This eliminates manual data entry, reduces administrative overhead, and ensures patient data flows quickly and accurately into your system.
Getting Started
To get started, you’ll need to install and configure the connector plugin on your WordPress site.
Key Features
- Direct integration with popular WordPress form builders.
- Real-time data transfer to CareHQ CRM.
- Secure and reliable data handling.
- Easy setup and configuration.
- Reduces manual data entry and potential errors.
Feature Details
More details about a specific feature…
Use the sidebar navigation to explore different topics, including installation, configuration, and troubleshooting.
Getting Started
To get started with this plugin first you’ll need to upload the plugin to your site.
- First find the email with the plugin attached to download, this can be found via email, or via your Victory Digital online shop dashboard.
- Then go to your wordpress site to add in the plugin
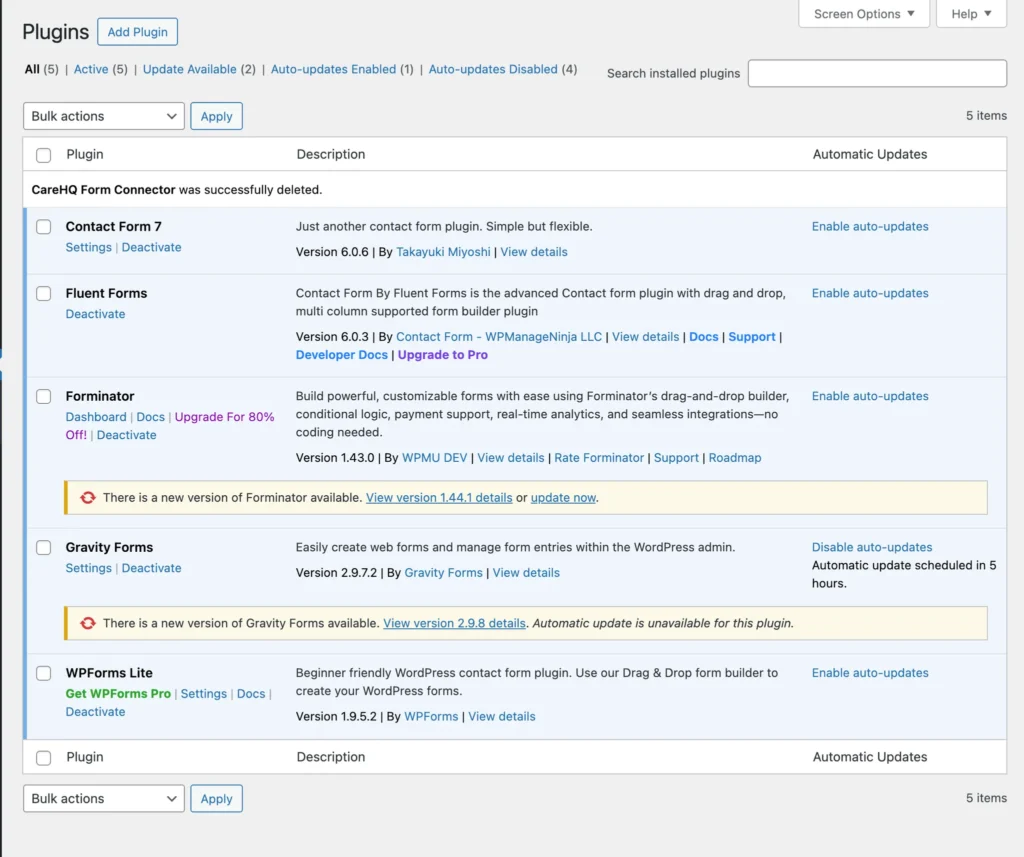
- Click add plugin and Upload Plugin then add the downloaded zip file
- Then click open or drag the folder in and then install plugin after that you should get this screen from there click activate the plugin.
Setting Up Plugin Details
- Click on CareHQ in the sidebar and enter your License Key
- Click Save & Validate License and reload the page
Integrating CareHQ
- Navigate to your CareHQ admin dashboard and go to the accounts page. (We recommend testing the plugin with your developer/test account first to ensure everything is working.)
- Click the API keys tab and copy your Account Id over to the plugin.
- Now click the Add button at the top and name it.
- Now give it permissions the following permissions (If the plugin has problems try giving it all permissions)
- Actions: Create & Read
- Care enquiries: Create & Read
- Groups Read
- Locations Read
- Now click save and this screen will show copy these keys over to the plugin.
- Click Save All Settings and Refresh the page
- Now click Refresh Locations and Refresh Sales Channel buttons in the top bar.
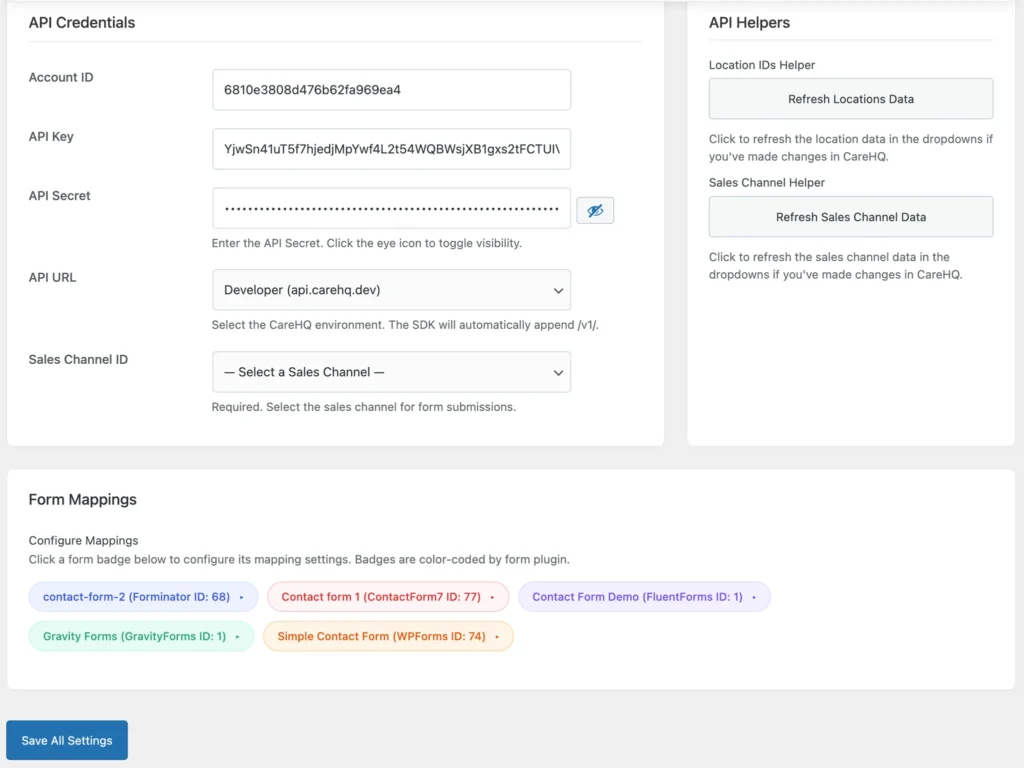
- Now click on Select Channel ID and set it to email or you’re preferred channel.
- Set API URL to developer to test and production for real world use.
Setting Up The Forms
- To configure your forms to work with the API first click which form you’d like to select and set a CareHQ Location.
- From here you can map your form values to the CareHQ Fields – (We recommend setting up your forms to use separate First Name and Last Name inputs rather than a combined one)
- From here map your available form fields too the CareHQ fields.
- Click Save All Settings and reload.
Testing It Works
- Try submitting the form you just setup
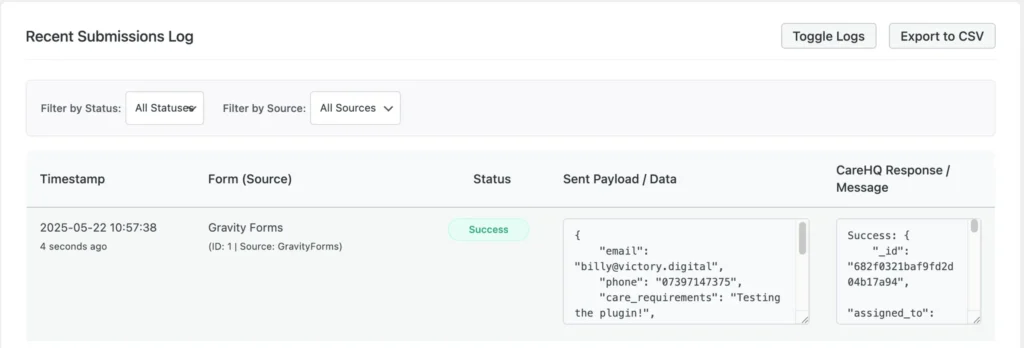
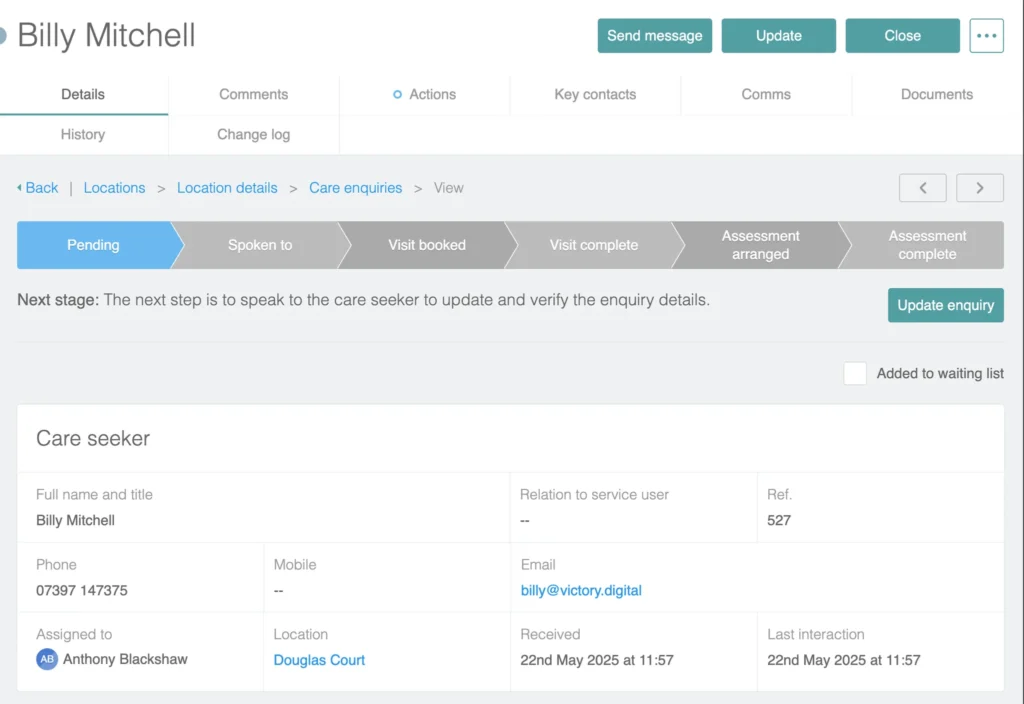
- If it works you should see a Success in the logs and the information in Care HQ