In my house hold, we are all huge Game of Thrones fans and are eagerly awaiting the launch of the season finale just like many of you are. A few weeks back, I had a request by the family to create a unique canvas, depicting us in the world of Game of Thrones. As a fan of Game of Thrones and a fan of Photoshop with more than 15+ years experience, I was more than happy to oblige.
So I set off to manipulate our family faces into the Hall of Faces (one of the shows most pictured places) and once completed, I sent the image off to be printed on canvas so we can hang it up in our house. Being happy with the result, I posted the outcome on to Reddit and it exploded with thousands of up votes as well as many people asking how I achieved it.
So in this post, I will show you the steps I took to create my family in the Hall of Faces and at the bottom of the page, you will find the original PSD file to download so you can create your own too.
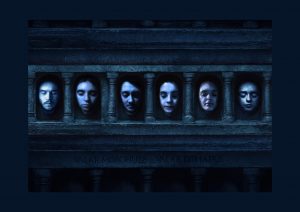
On the Right: the picture shared on the Game of Thrones sub Reddit
Step 1: Background and Photo
To begin with, you will need to download the background file at the end of this document. Once you have that, become acquainted with it, check out the layer structure and background layers. The background layers have already been done for you, so at this point, no work needs to be done to it.
Before we can get working on the creative side you will need to take photo’s of the faces you would like to use. For this, ensure that all of the pictures you are taking are in the same light and your faces have their eyes closed and their face slightly lowered. See the image on the right and try to keep your faces in line with the character faces. If you do this, it will make your image more believable. Once you have taken your photographs, transfer them over to your PC, ready for manipulating in Photoshop.

Step 2: Prepare Your Photo
This is probably the most important part of this. First of all cut out your face using the pologonal lasoo tool, at the top of photoshop, you will see an option to feather, I set this to 0.5 and will ensure your image is not overly sharp (important for when we do the shadowing. Simply cut out around the outside of the face – do this bit by bit in case you accidentally chop off half your face.
Once you are done with that, it is important to work on the colouring, all of which will be under ‘image’. To make things easy, click ‘auto tone’ and then ‘auto contrast’. This will start the process of bringing this into line with the rest of the image.
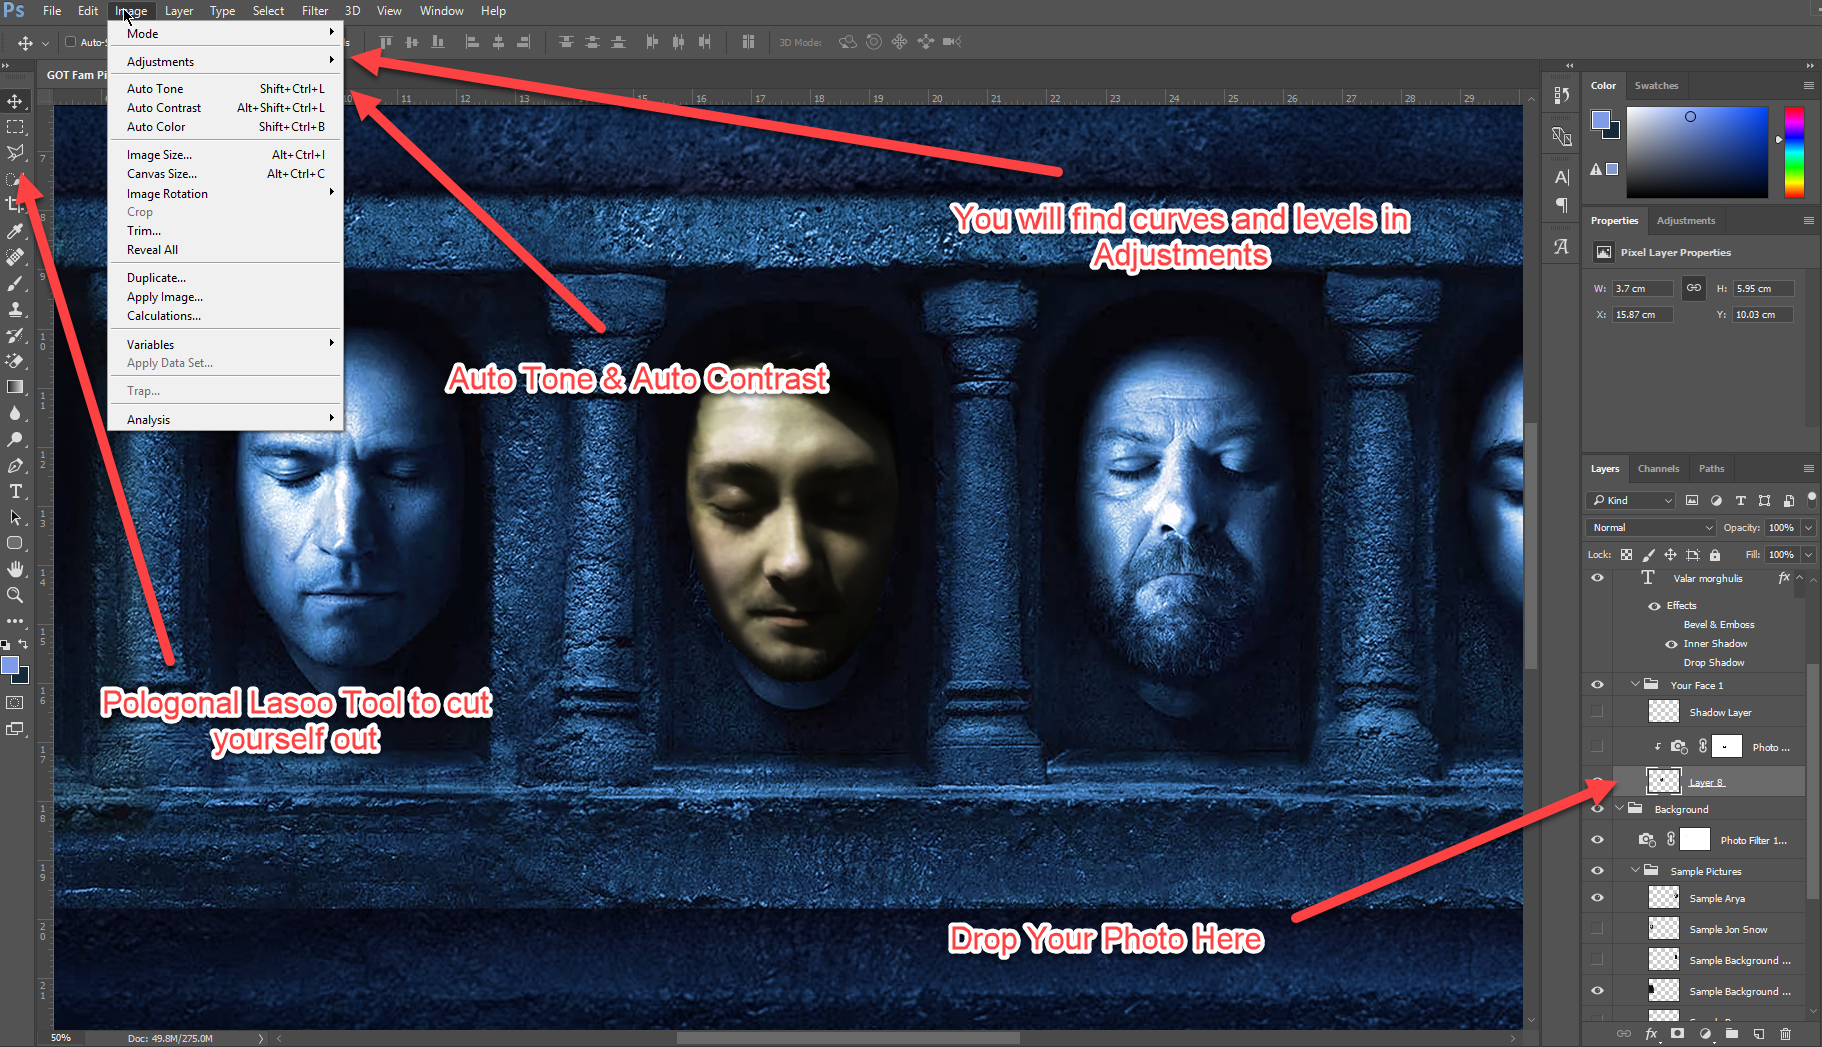
Once you have done that, you will now need to play with this next bit as it will depend on your facial colour, lighting and shadows. I recommend going into image > adjustments and play with the levels and curves tool to help saturate and contrast your photo. You will most likely need to de-saturate your image a little bit to bring it in line. Remember to use the existing Game of Throne characters to help you make this look as similar as possible – that is why they are in the file. Don’t be afraid to spend a while on this, this is the most important part of this tutorial and will ensure you fit in seamlessly with the rest of the image.
Step 3: Shadowing
You will notice that your image does not blend in as well as the other faces. This is due to the shadowing that will blend it together. To do this, create a new layer and use the eye dropper tool to find the correct colour of the background (next to your face). Once you have done that, use a brush to draw around your face where your shadow should be. Be sure to put the hardness to 0% because this will help when we smooth it out.
If you have drawn over your face a little bit, don’t worry, we can now use the blur and smudge tools to work around the shadow. Take some time with this and make sure it looks natural. Each face you do will be unique, so you will need to repeat this process per face. I have left my layer in with the PSD file, so you will see how it turned out for me.
Once you have finished with the shadowing and blending into the background using your shadow layer, you can now apply the photo filter to your picture. I have already created one for you, so you can right click the layer and duplicate if you need to apply it to another picture. It is best to only apply it to your photograph, so make sure the photo filter is layered above your photo, right slick the layer > create clipping mask.

Step 4: Touch Ups & Repeat
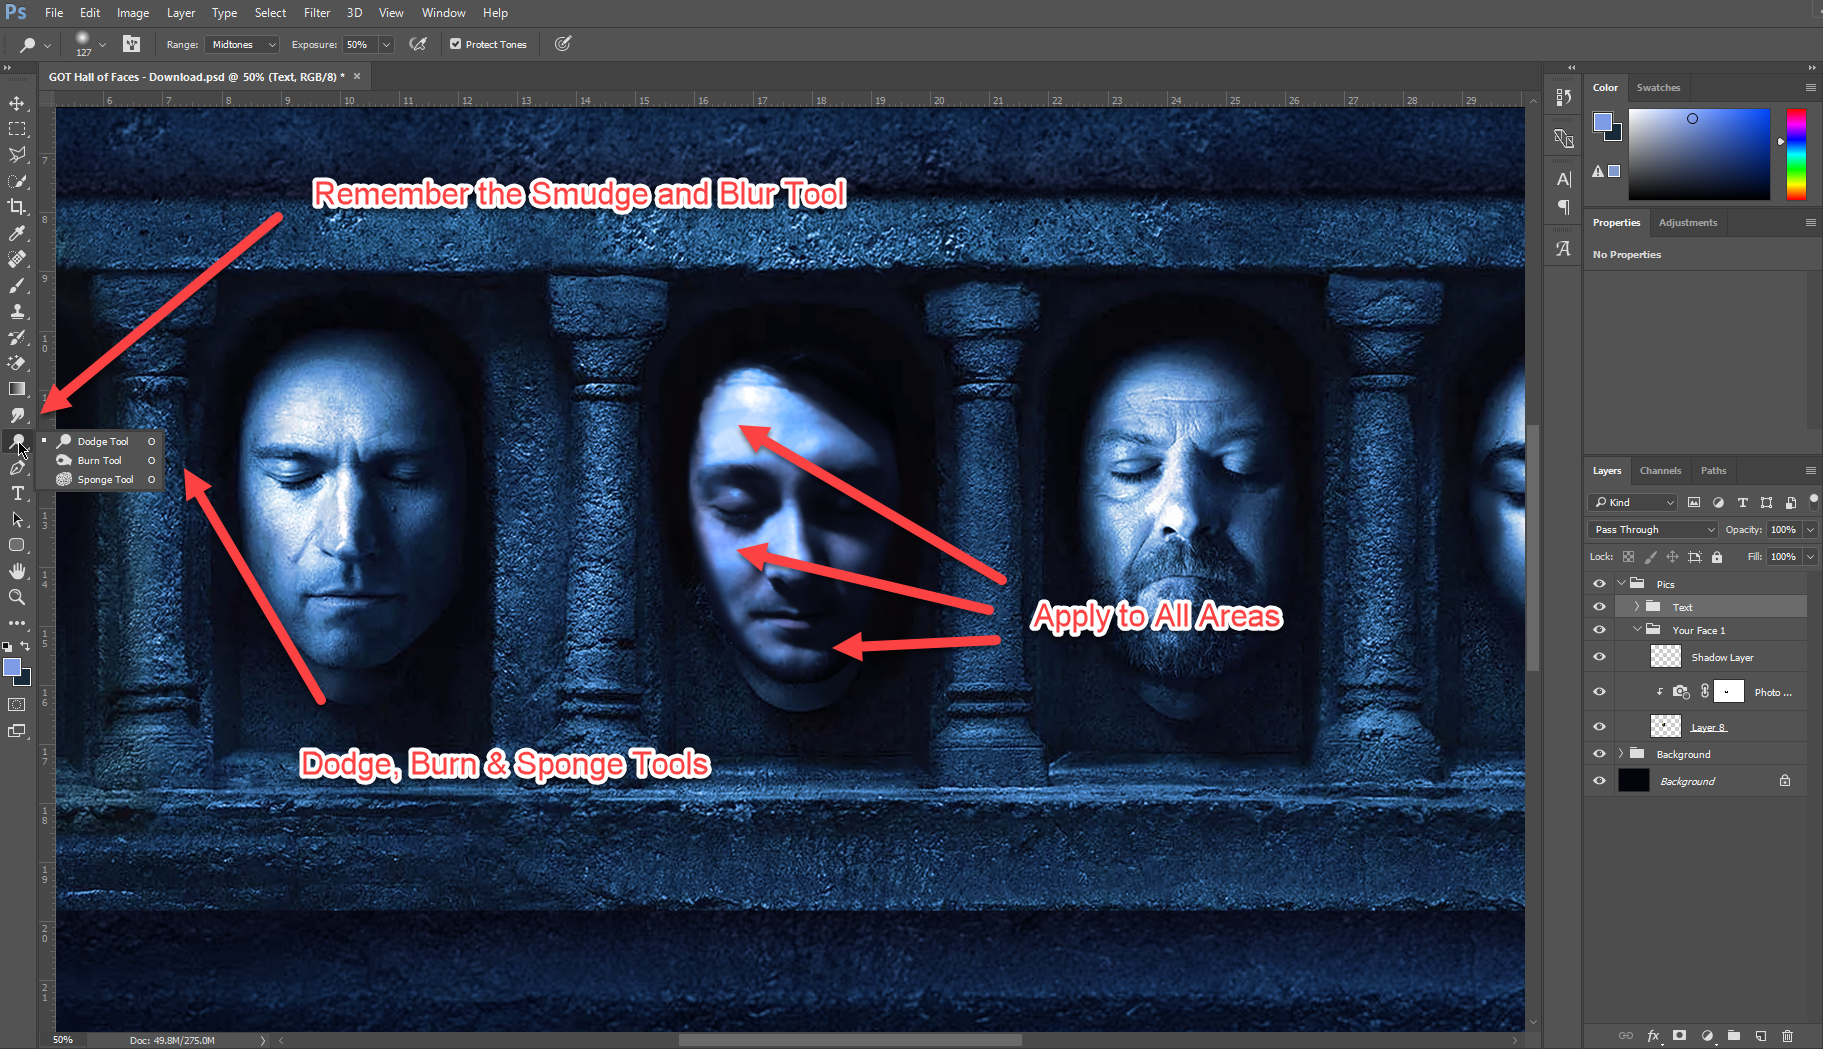
You may have a pimple or part of the face that needs to be smoothed out. For this, you can use the Dodge, Burn and Sponge tool to help manipulate this area. Also don’t forget about the smudge and blur tools, all of these combined will help you get the right combination. For this bit, it is important to again, follow the original characters and keep them in line – be creative with this and don’t be afraid to spend some time to get it just right. For me, this was the longest part of the design process and took along the lines of three hours.
Also use your shadow to blend in as well. The shadow can help you to cover up areas that stick out or shouldn’t really be there – so keep that in mind also. Once you have done that, repeat the whole process again for all of your photographs!
So there you go, that is how I managed to create the picture and i am grateful for all of the positive replies we had about the picture. But before you go, be aware that in the background section of the PSD, there are example background edits as well as sample Jon and Arya pictures that i practised on – so be sure to check them out also.
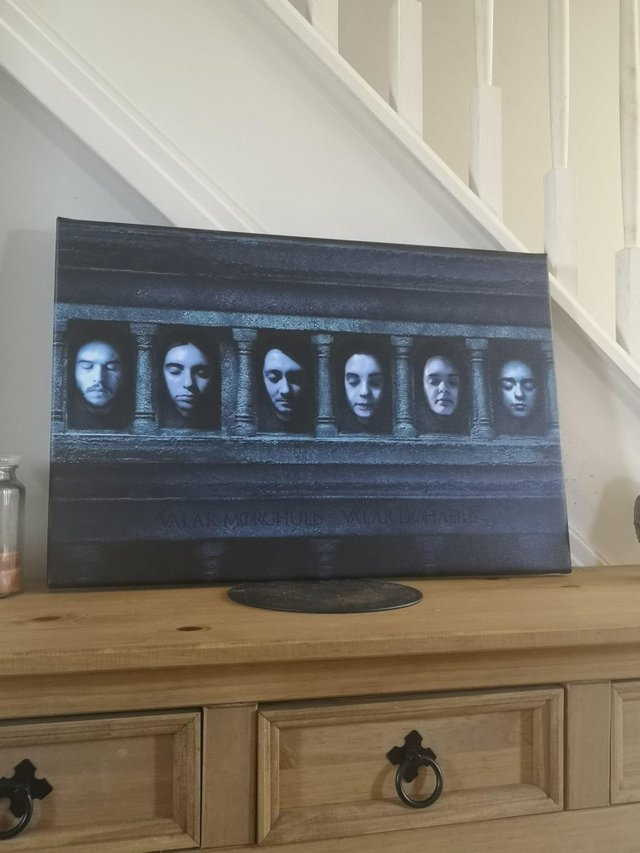
On the right is the end product for our family, we absolutely love it and it will be hung up on the wall very soon.
As I know there was a lot of you wanting to try this out, let me know how you got on in the comments below!
Keep Up To Date With All Things Digital Marketing
We post regularly on our blog and showcase the very best and latest digital marketing news and techniques. Build on your ideas by staying in touch and by reciving our exclusive digital marketing news bulletins. Sign up and subscribe to get our free monthly email by using the form!
I am text block. Click edit button to change this text. Lorem ipsum dolor sit amet, consectetur adipiscing elit. Ut elit tellus, luctus nec ullamcorper mattis, pulvinar dapibus leo.